Water tanks are essential for storing and supplying water in residential, commercial, and industrial settings. Over time, however, water tanks can develop leaks and cracks, leading to water loss and contamination. Waterproofing a water tank is critical to ensure its longevity, maintain water quality, and avoid unnecessary expenses. This guide provides a detailed, plagiarism-free explanation of the process, materials, and techniques used for waterproofing water tanks.
Waterproofing a water tank is essential to prevent leaks and maintain structural integrity. Here’s a step-by-step guide for water tank waterproof treatment:
Materials Needed:
1. Waterproofing chemicals (e.g., liquid membranes, crystalline waterproofing compounds, or epoxy coatings)
2. Cement and sand (if using a cement-based waterproofing mix)
3. Brush or roller
4. Cleaning tools (wire brush, sponge, detergent)
5. Water
—
Step-by-Step Process:
1. Cleaning the Tank
Empty the tank completely.
Scrub the surface using a wire brush and detergent to remove dirt, algae, and debris.
Rinse thoroughly with clean water and let it dry.
2. Inspect for Cracks
Check for cracks or damage.
Use a repair mortar or epoxy filler to seal any cracks before applying waterproofing treatment.
3. Apply Waterproofing Coating
For Liquid Membrane:
Mix the liquid membrane as per the manufacturer’s instructions.
Apply the first coat using a brush or roller and allow it to dry (usually 6-8 hours).
Apply a second coat for better durability.
For Crystalline Waterproofing:
Mix the crystalline compound with water to form a slurry.
Apply it evenly to the surface.
Keep the surface moist for a few days to allow crystal formation inside the concrete pores.
For Epoxy Coating:
Mix the epoxy resin and hardener.
Apply two coats to the interior walls and floor for a strong waterproof barrier.
4. Curing
Allow the waterproof coating to cure as per the product’s specifications (usually 48-72 hours).
5. Testing
Fill the tank with water and observe for any leaks over 24-48 hours.
Understanding the Importance of Waterproofing
Waterproofing a water tank offers numerous benefits:
Prevents Leakage: Cracks or joints in water tanks can cause water to seep out, leading to wastage and damage to surrounding structures.
Maintains Water Quality: Waterproofing helps prevent contaminants from seeping into the tank, keeping the stored water safe and clean.
Extends Lifespan: Proper waterproofing protects the tank from damage caused by water pressure, weather conditions, and chemical reactions.
Cost-Effective: Waterproofing minimizes repair costs in the long run by preventing frequent maintenance and replacement needs.
Types of Water Tanks
Before diving into the waterproofing process, it’s crucial to identify the type of water tank. The material of the tank affects the choice of waterproofing method:
Concrete Tanks: Common in residential and commercial spaces, these are prone to cracks due to structural stress.
Plastic (PVC) Tanks: These are lightweight and resistant to corrosion but may develop leakage at joints or seams.
Metal Tanks: Often used in industrial settings, they are prone to rust and corrosion over time.
Fiberglass Tanks: Durable and resistant to rust but may need additional waterproofing for long-term use.
Signs That Your Water Tank Needs Waterproofing
Look out for the following indications that your water tank requires waterproofing:
Visible cracks on the tank’s surface.
Dampness or water patches around the tank’s base.
Reduced water levels without regular usage.
Rust or corrosion on metal tanks.
Algae or mold growth, indicating seepage and contamination.
Steps to Waterproof a Water Tank
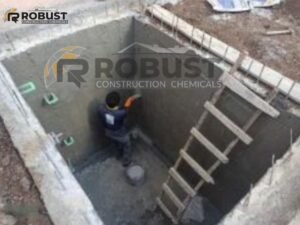
1. Preparation
Empty the Tank: Drain all water from the tank and clean it thoroughly.
Inspect for Damages: Check for visible cracks, holes, or weak joints. Mark areas requiring special attention.
Clean the Surface: Remove dirt, algae, and other impurities using a wire brush or pressure washer. Allow the tank to dry completely.
2. Seal the Cracks and Joints
Fill Cracks: Use a high-quality crack sealant or epoxy filler to patch up visible cracks. Ensure the material is compatible with the tank material.
Seal Joints: Apply a waterproof adhesive or sealant to joints and seams to prevent leakage.
3. Apply a Waterproofing Layer
There are several waterproofing products and techniques available. Choose one based on the tank material and condition:
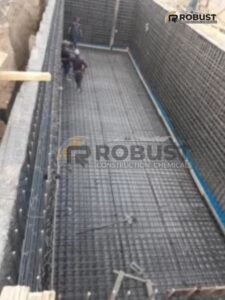
Cementitious Waterproofing:
Ideal for concrete tanks.
Mix a cement-based waterproofing compound and apply it to the tank’s interior walls and base using a brush or roller.
Apply at least two coats, allowing sufficient drying time between layers.
Liquid Membranes:
Suitable for various tank types.
Apply a liquid waterproofing membrane evenly across the tank’s surface.
Ensure all areas, especially corners and joints, are adequately covered.
Polyurethane Coatings:
Best for metal and plastic tanks.
Apply a layer of polyurethane coating to create a durable and flexible waterproof barrier.
This method is effective for tanks exposed to extreme weather conditions.
Bituminous Coatings:
Effective for underground or partially buried tanks.
Apply a bitumen-based coating to the exterior surface of the tank to protect against water seepage and soil moisture.
4. Test for Waterproofing
Once the waterproofing layers have dried, fill the tank with water to test for leaks.
Monitor for 24-48 hours to ensure there are no signs of leakage or dampness.
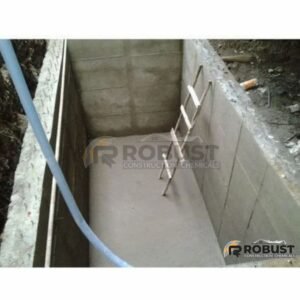
5. Final Touches
Apply a protective paint or layer, if necessary, to enhance the durability of the waterproofing.
Ensure all entry and exit points, such as pipes and valves, are sealed and secure.
Choosing the Right Waterproofing Material
Selecting the appropriate waterproofing material is essential for effective results. Here are some popular options:
Cement-Based Products:
Pros: Affordable, easy to apply, suitable for concrete tanks.
Cons: Limited flexibility, may crack under extreme pressure.
Liquid Waterproofing Membranes:
Pros: Flexible, versatile, excellent coverage.
Cons: Requires skilled application, relatively expensive.
Polyurethane Coatings:
Pros: Durable, UV-resistant, ideal for metal and plastic tanks.
Cons: Costlier than other options.
Bituminous Coatings:
Pros: Highly effective for underground tanks, excellent resistance to moisture.
Cons: Not eco-friendly, may degrade under UV exposure.
Maintenance Tips for Waterproofed Tanks
Regular Inspections: Check the tank periodically for cracks, leaks, or signs of wear.
Clean the Tank: Schedule regular cleaning to remove sediment, algae, and impurities.
Monitor Water Levels: Unexpected drops in water levels may indicate leakage.
Repair Promptly: Address minor cracks or damages immediately to prevent bigger issues.
Reapply Waterproofing: Depending on the product used, consider reapplying the waterproofing layer every few years.